Search This Blog

Thursday, June 20, 2013

Entry Table


I finally finished building my entry table!! It was not hard to make but it took me awhile because my daughter had been really sick and I couldn't really work on any projects. After two weeks of her being sick though she is finally coming around!! I have been searching for an entry table for probably 8 months now. I have a funny spot when you walk into my house that needed something done with it but with its wacky dimensions nothing was working. I saw this table online and really wanted it! Like I've said  hundreds of times though, why buy something when you can make it yourself. I surly was not going to spend over $200 on a table.

I got really, really lucky and randomly came across this awesome tutorial for an entry table here. I copied almost everything exactly as she explained because I loved it so much. It was very similar in looks to what I was searching for and was so glad I found it! The only thing I changed was the dimension of the table from what she gave to what would suit my needs for my little space.

This is what the table looked like when it was all put together and while I was waiting for the faux drawers to dry.

 
Once everything was nice and sturdy I stained the entire table. It is not necessary to stain the entire table but I wanted to rough it up a little after I painted it and wanted a darker color to come through instead of the bare pine color. You could totally get away with only staining the table top though.
 
 
And this is what it looked like before I put the knobs on. It fits perfectly in my entry way. I am so happy with how it turned out! Now all I have left to finish is decoration and putting up the final details to really make it into a real entry way.  :)


Pin It Now!

Friday, May 31, 2013

Lilliana's 1st Birthday

 
Well, I officially only have 177 more days to figure out what I'm going to do for Lilliana's 2nd birthday party. :) As I was brainstorming ideas today I decided to look back at what I did for her first birthday. 

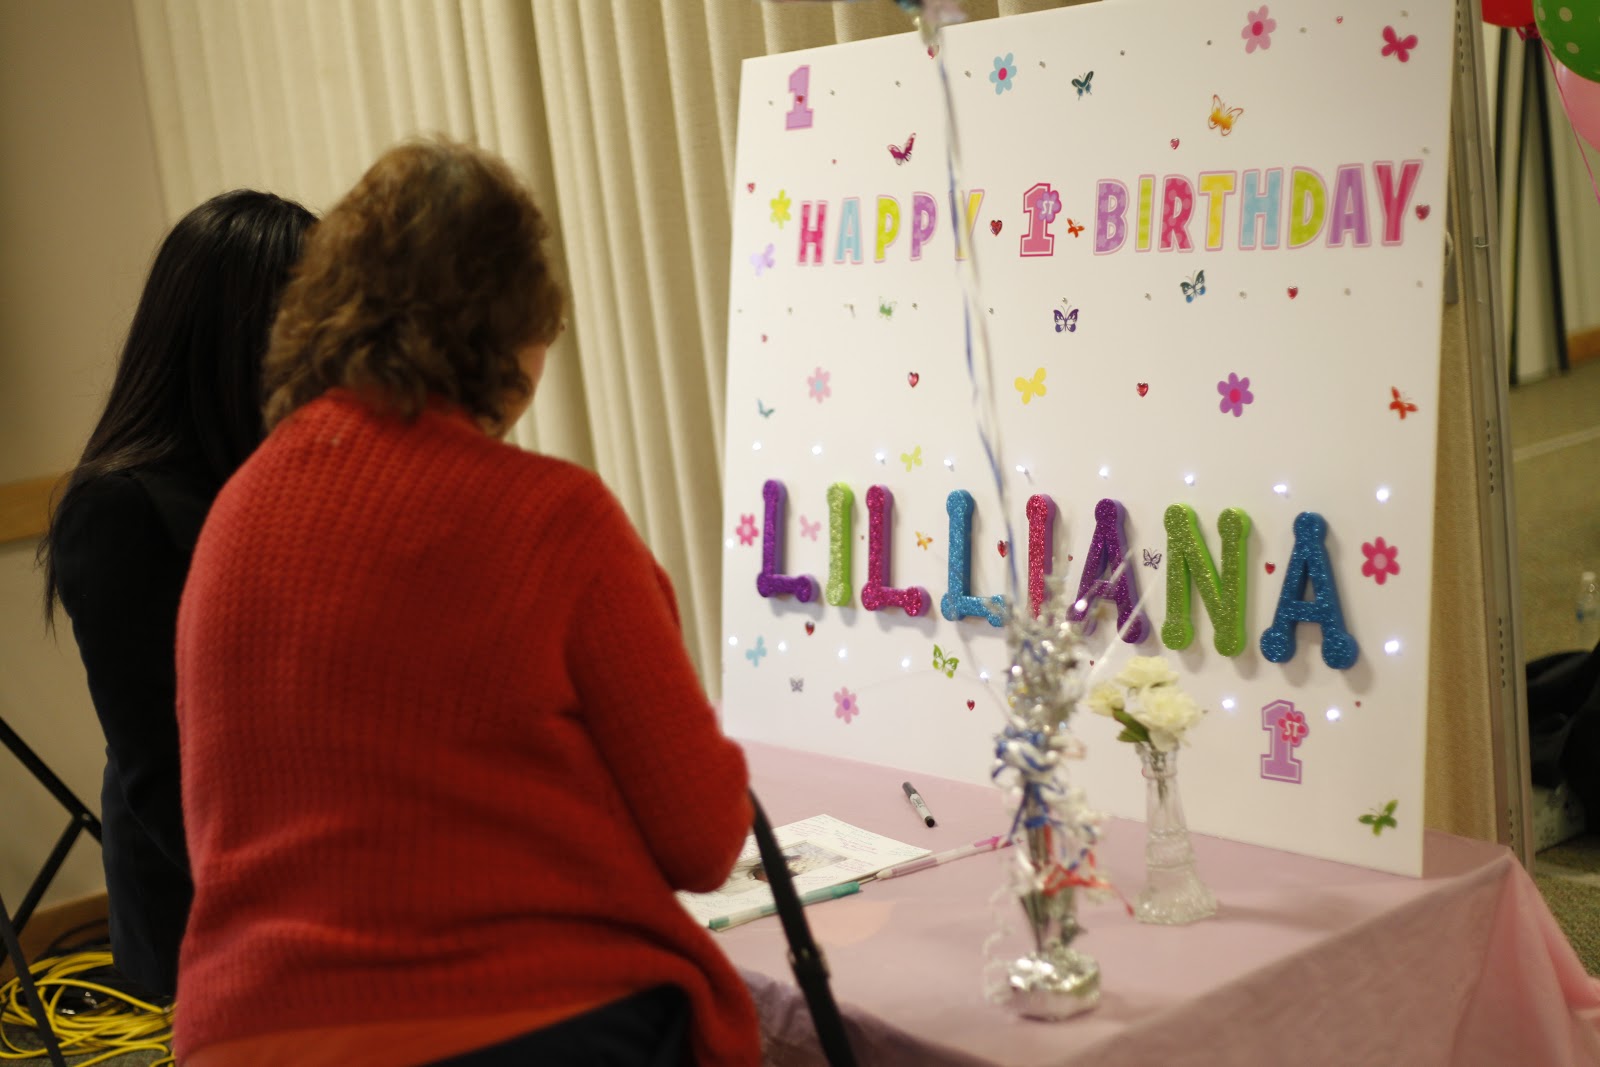
I threw her a pink and green polkadot theme party and wanted to share all the hard work I put into it. We have a lot of aunts and uncles and cousins and second and third cousins so I knew there was going to be a ton of people there, and when I mean a ton only counting family we were around 80 people already. So I rented out a beautiful building and actually set it up the night before her birthday party. I set up all the tables and covered them in a light pink table cloth. Then I found these awesome small rolls of green polkadot tulle at the craft store and used them as the table runners. They were sparkly and so cute and worked so well as table runners. I then for eye appeal alternated plates and napkins with polkadot plates and napkins and pink silverware. 


For the centerpiece I hand made these cute little tissue flowers that I stuffed with pink and green chocolates for everybody to take as their favors as well. I ordered a ton of pink and green polkadot balloons as well and used them for height on each of the tables as well. 


I handmade the cupcake stands to have pink and green polkadots too. That was just a matter of cutting out different sized pieces of think cardboard and then hot gluing polkadot ribbon around the outside. I then covered canned fruit in plain white paper to make the different heights or tiers of the stand. Of course the cupcake liners were theme appropriate too. 
 

I was very surprised when my dad walks in with a light up poster sign he handmade for the entrance of the party. It was awesome!


The food table was even all pink and green too. (well the food itself wasnt pink and green, just the desert and utensils) I made a strawberry lime punch and all the food was displayed in pink and green bowls. The straws were even ordered online to be pink and green! Instead of using the traditional rice krispies for rice krispie treats I used Trix instead for Trix Krispie Treats...they were a HUGE hit and delicious and matched so well :)


It was a lot of work setting it up and making everything by hand but all the fun we had was what really mattered. I love when all of the family can get together and I especially love when this little girl is happy :)

Pin It Now!

Tuesday, May 28, 2013

Decorating a full length mirror

I have not yet finished decorating my daughters room yet but those of you that know me know I like to make things harder on myself. Halfway through my daughters room redecorating I decide I need to also start working on redoing my bedroom. Oh boy. I took the dresser from her room (the wallpapered one) and put it back in our room. My mom had an extra dresser at her house she said I could redo which is currently in my daughters room taking up less space.


              (the before and after of the current dresser in my daughters bedroom)
 
I sanded the above dresser all down because it was a very glossy white and then painted the entire dresser a very soft blue. I then stenciled the front of the dressers with white paint to make the entire stenciling very subtle. Now all I have to do is find a mirror to add to the dresser :)
 
Now, moving on to a little bit of my bedroom. I decided to add a full length mirror onto our closet door. The only issue with it was that you could tell it was one of those $5 plastic mirrors. I thought it looked too cheap and plain and decided I needed to decorate it. 

                                                                
                                                                          (before)

My husband and I will be celebrating our 3rd wedding anniversary in July so I decided to look through a couple of our wedding boxes we kept in the garage. I came across all the center pieces I made for our reception and decided I didn't want to decorate my mirror with just any old thing I wanted to use something from our wedding to make it more meaningful. That's where the centerpiece fillers come in. I used those decorative clear rock things (yes thats the technical term lol) that sort of look like marbles to fill all the vases that were sitting on the tables at the reception.


                                                            (after)

I brought in a bunch of the rocks and busted out one of my favorite craft tools, my hot glue gun, and simply glueed them on the frame of the mirror. I think it makes it look a little more glamorous and pretty than if I were to have just left it plain.


Pin It Now!

Monday, May 6, 2013

Chalk Board Table


My daughter is joyfully obsessed with sidewalk chalk right now. She even decided to sneak some inside the house one day and draw all over the wall!! I decided to make her a chalkboard craft table that she is free to draw all over when she sneaks in her next batch of chalk. :)


Above is what the table looked like before I started. (and yes that is a shadow of me taking a picture of the table :)) I lightly sanded it and wiped it all down. The I spray painted the bottom shelf a bright pink just so it wasn't all black. I wanted it to pop! Then I covered the bottom after it dried (to make sure no black paint got on the pink) and applied 4 light coats of the black spray paint chalk board paint. I followed the back of the can's directions for the most part, but I did read reviews of people saying they needed to apply about 4 coats of paint for it to work better so I did 4 just to be safe. This is what it looks like now!! Lilliana's new craft table that she can draw all over!
                                                            

Pin It Now!